
For the armed citizen carrying a concealed weapon can bring both peace of mind and responsibility to maintain readiness of their skills but also their equipment. While our example is the Sig Sauer P365, the principles of pistol cleaning and maintenance apply to nearly every make, model, and action on the market.
Step 1: Setup
For this task of cleaning your Everyday Carry Pistol, we’ll first need to get the following tools together:
- Cleaning Mat
- Breakthrough Solvent (6oz)
- Breakthrough Lubricant (6oz)
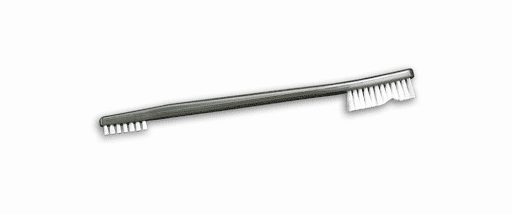
- Nylon Brush
- Bore Brush Rod
- Bore Brush (Caliber of EDC Pistol in this instance .35cal/.38cal/9mm)
- Cottontail Cleaning Swabs
- Cleaning Cloth
- Cleaning Wipes
- Rubber Gloves (optional but encouraged)

We currently use products from Breakthrough Clean like their Standard Cleaning Kit that will cover most of your pistol and rifle cleaning needs. Be sure to visit us or stop by our Online Store to check out more Breakthrough Clean packages for different gun types and calibers..
Once you have our tools for the job and a safe, controlled, and well lit environment to work in you’ll first begin by ensuring the weapon is clear and safe to work on.
In a safe direction:
- Remove the magazine
- Pointing the muzzle in a safe direction, lock the slide to the rear with your finger outside of the trigger guard
- Visually inspect the magazine well to ensure it’s clear
- Visually inspect the chamber to ensure it’s clear
Step 2: Disassembly
Once you’ve confirmed that the weapon is cleared and safe to work on, locate the takedown lever and rotate it clockwise until it reaches its mechanical stopping point at or slightly beyond the 90 degree pointing downward towards the trigger guard.
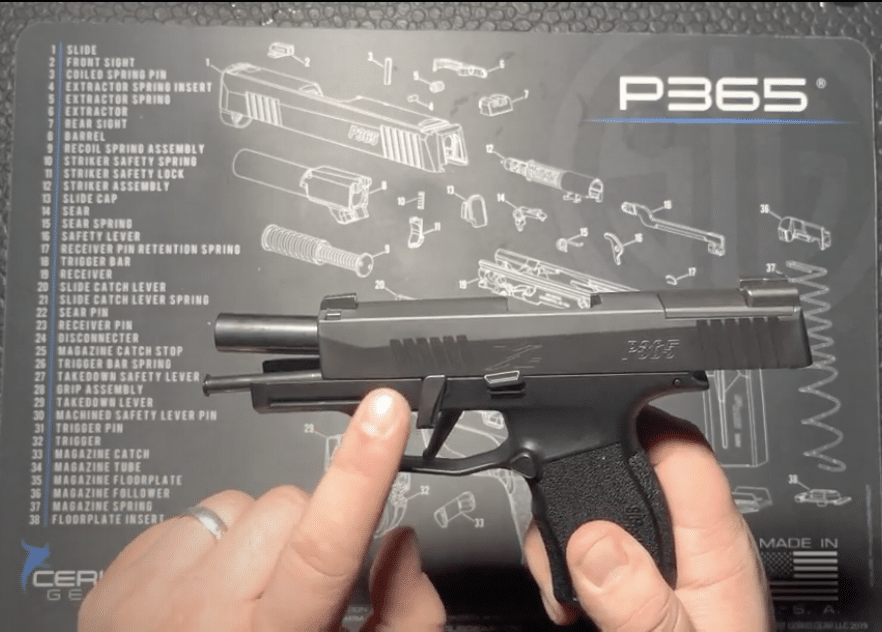
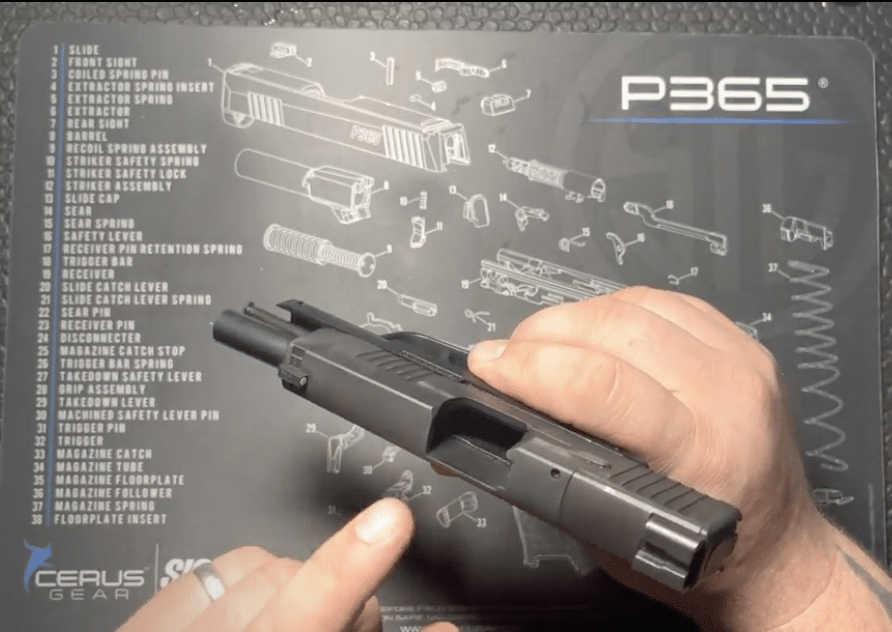
With the takedown lever rotated into the 90 degree position, push the slide slightly towards the rear of the frame until the slide lock releases and move the slide forward towards the front of the gun. Once the slide has been removed, set the frame to the side to continue disassembly of the slide.
Once the frame is set to the side, slightly load the recoil spring to remove tension of the recoil spring against the barrel, this will allow you to remove it from the slide assembly. Once this is complete move the barrel forward and remove from the slide assembly. Place both items next to the frame. You’ll start on the slide now that you have the weapon disassembled (see Picture 4).
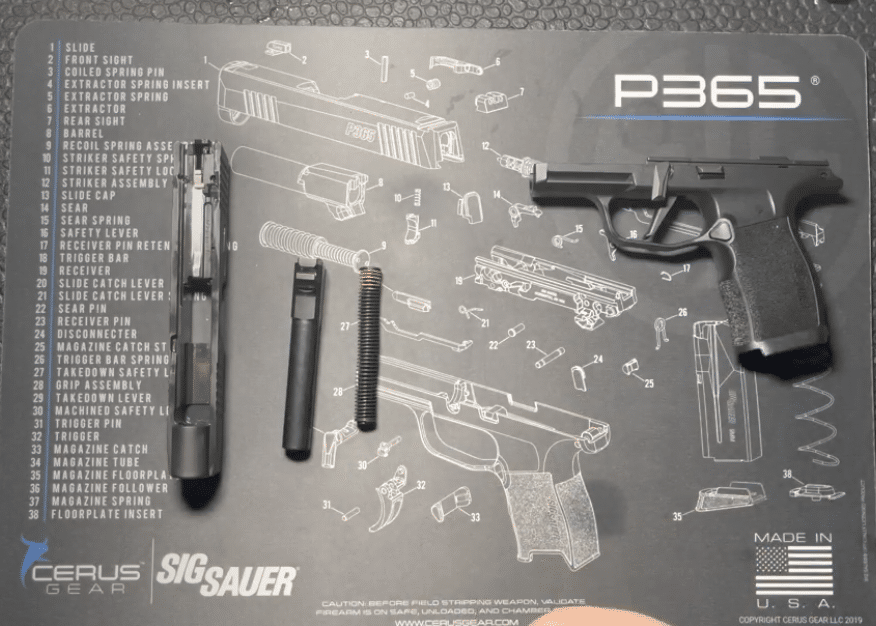
**You can disassemble the slide and frame further but this is unnecessary to perform general and routine maintenance on your Everyday Carry Pistol. If you have issues with a component of your pistol that isn’t addressed in general maintenance we highly recommend seeking out a certified armorer who can assist you in diagnosing your issue and sourcing the parts for your repair.**
**If you have a high level of muck or grit in your frame or slide from your operating environment you can use compressed air to force the grit out of most of the tight spots that can be hard to reach with the tools used for regular maintenance.**
Step 3: Cleaning
First, you’ll use solvent to loosen any dirt, carbon, or other fouling that you may have on your firearm. For this we currently like to use Breakthrough Solvent by Breakthrough Clean. Give the bottom portion of your slide assembly, your barrel, your recoil spring and the inside of your pistol frame a light spritz. Let the solvent soak for a few seconds while you grab your next tool, a nylon brush, to allow the solvent a chance to break up carbon that may have built up inside the moving parts of your Everyday Carry Pistol. The goal is to get solvent onto every piece of the firearm that has the potential to have buildup with an emphasis on moving parts. It’s critical to keep these components operating cleanly and efficiently to ensure your Everyday Carry Pistol is ready at all times.
Once your Breakthrough Solvent has been applied and had ample time to soak, take a Nylon Brush and scrub with adequate pressure the areas you have solvent applied. Be sure to use a Nylon Brush and NOT a brass or steel bristle brush to avoid any potential in marring or removing any protective finishes on your firearm. The combination of the soaked in solvent and the light brushing should do the trick in breaking up and removing any determined bits of carbon that have adhered themselves to the inside of your pistol.
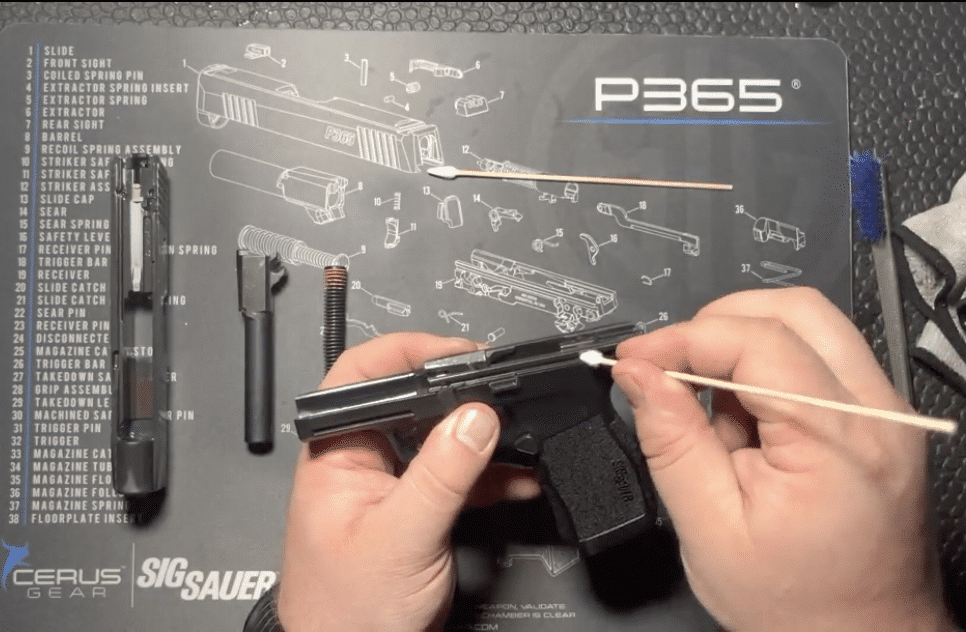
For the barrel you’ll begin with the chamber and feed ramp, this is where the carbon build up will be heaviest if you’ve been training heavily with your Everyday Carry Pistol. For difficult to reach places we’ll opt for our nylon bore brush (9mm caliber in this case) to punch the inside of the barrel. Using the bore brush gives us the ability to clean into the rifling grooves inside the barrel throughout its entire length giving us optimal performance and reducing chance for pitting or other permanent damage.
For the recoil spring, give it a once over with the nylon brush if there is visible sand or grit and then utilize a Cleaning Cloth to wipe off any excess solvent.
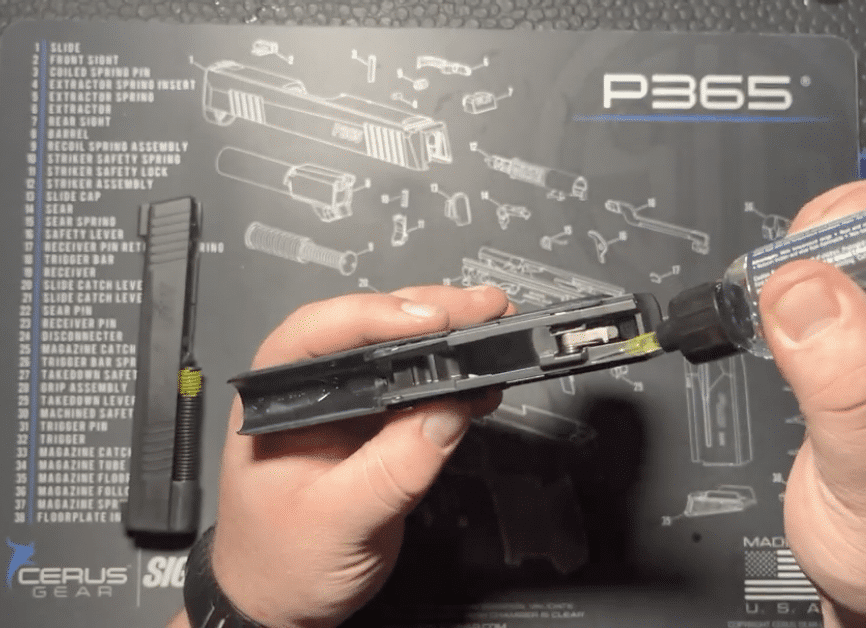
For the pistol frame, begin with the Nylon Brush to get any big stuff, be sure to focus on the at the top of the magazine well, along the rails where the slide contacts the frame and along the firing mechanism and sear. Once you have given the frame a scrub with the nylon brush, pull out a few Cottontail Cleaning Swabs to reach the deep and hard to reach places where carbon may still be hanging on.
Once you’ve completed the frame, run the swabs along the inner rails of the slide assembly to clear out any remaining carbon that may be there as well.
Once you’ve completed removing the carbon build up, dust, and grit that may have built up on your Everyday Carry Pistol grab the Cleaning Cloth and give each component (slide assembly, recoil spring assembly, barrel, and frame) a thorough rub down to remove any carbon and excess solvent that may remain leftover from the cleaning process.
Step 4: Lubrication & Reassembly of the Slide
As you lubricate the pistol, you’ll also begin to reassemble, starting first with the slide assembly.
Grab your Breakthrough Lubricant and apply a dab on each side of the rails at the front and rear of the slide assembly. These four dabs will coat the entirety of the rails of both the slide and the frame during the reassembly process. When it comes to lubricants for Everyday Carry Pistols, a little bit goes a long way and the goal is to apply enough to reduce friction but not to create excess that will leak into our holster, onto our clothes, or onto our skin.
Once you’ve lubricated the slide assembly, place a dab of lubricant on the top of the barrel at the front of the and rear of the barrel where it locks up against the slide. Drop the barrel back into place and pick up your recoil spring assembly. Run a light line of lubrication along the recoil spring assembly and reinsert the recoil spring assembly back into its slot on the bottom of the barrel. Place the recoil spring assembly into the end of the slide assembly first and then slightly load the spring as you press the piece toward the barrel and the ledge for it on the bottom of the barrel. Be careful to maintain positive control of the spring with two hands while you place the spring assembly to prevent losing control of it.
With the slide reassembled, set it to the side and lubricate the frame with a dab of lubricant on each side of the rails at the front and rear of the rail guides. Be sure to not over lubricate and create unnecessary and messy excess.
Step 5: Pistol Reassembly & Cleanup
Once the frame is lubricated, pick up the frame in one hand and the slide in the other and place the rear of the slide onto the front of the rail guides on the pistol frame. The slide assembly should glide unrestricted into place and be able to be pulled all the way rearward until the slide lock can be engaged.
If the slide doesn’t move freely or you meet resistance as you attempt to reassemble, don’t force it. Back off the slide from the frame’s guide rails, check the positioning of the barrel and recoil spring assembly and make a second attempt.
If the slide doesn’t lock all the way to the rear, don’t force it. Remove the slide completely from the frame, reposition the recoil spring assembly and make a second attempt to reassemble.
If there are further issues consult your local certified armorer who can assist you in any repairs.
Finally, take your Cleaning Cloth and wipe down your pistol to remove any excess lubricant that may be oozing out of the internals of your gun.
Conclusion
That’s it! As always be sure to clean up any used consumable items like the cotton swabs and store your lubricants and solvents in a safe location away from food, beverages and pets. If you were bare handed during the cleaning process be sure to wash your hands thoroughly. Stay tuned for more tips, guides, and how to’s.
Until next time stay safe and have fun!

Related Posts